
Chicken Katsu is a Japanese breaded cutlet made by coating thinned chicken breast in panko breadcrumbs and pan-frying it in neutral oil. The dish belongs to the yoshoku tradition, a category of Japanese cuisine that adapts Western cooking techniques to Japanese ingredients and palates. Chicken Katsu shares its breading method with tonkatsu, the pork cutlet version that served as its direct predecessor in Japanese culinary history.
One serving of Chicken Katsu provides approximately 42 grams of protein and 480 calories. The dish qualifies for halal dietary frameworks when prepared with halal-certified chicken. Chicken Katsu suits weeknight dinners, bento box meal prep, and casual family meals where a satisfying, portion-controlled protein is needed.
Chicken Katsu pairs naturally with katsu curry, a Japanese dish that ladles a mild, roux-thickened curry sauce directly over the sliced cutlet and steamed rice. This recipe uses a double-dredge technique, passing each cutlet through flour, then egg wash, then panko twice, which builds a thicker crust that stays crisp for up to 20 minutes after frying.
Chicken Katsu Recipe
Ingredients
Equipment
Method
- Pound the Chicken Breasts: Place one chicken breast inside a zip-lock bag or between two sheets of plastic wrap on a cutting board. Strike the thickest part of the breast with the flat side of a meat mallet or a rolling pin, working from the center outward toward the edges, until the breast reaches a uniform 1.2cm / 0.5in thickness. Repeat with the remaining 3 chicken breasts. Even thickness allows every part of the cutlet to cook through in the same amount of time, preventing dry edges and an undercooked center.
- Season the Chicken: Combine the kosher salt, black pepper, and garlic powder in a small bowl and stir until evenly mixed. Pat each pounded chicken breast dry with paper towels to remove surface moisture. Sprinkle the seasoning blend evenly over both sides of each breast and press gently so the seasoning adheres. Dry surfaces allow the flour layer to bond more firmly to the chicken, which anchors the breading during frying.
- Set Up the Breading Station: Arrange three shallow bowls in a line on the counter. Add the all-purpose flour to the first bowl. Whisk together the 2 beaten eggs and 2 tablespoons of whole milk in the second bowl until fully combined with no streaks of yolk visible. Pour the panko breadcrumbs into the third bowl and spread them into an even layer. A sequential breading station prevents cross-contamination between the dry and wet coatings, which keeps each layer intact on the cutlet.
- Bread Each Cutlet: Working with one chicken breast at a time, dredge it in the flour bowl and press firmly to coat both sides and all edges. Shake off any excess flour. Dip the floured breast into the egg wash, letting any excess drip back into the bowl. Transfer immediately to the panko bowl and press down firmly, turning the breast over and pressing again, until the entire surface is covered in a dense layer of panko. Set the breaded cutlet on a clean plate and repeat with the remaining 3 breasts. Pressing the panko firmly into the egg wash ensures the crumbs bond tightly and do not separate from the crust during frying.
- Heat the Frying Oil: Pour 240ml / 1 cup of neutral oil into a 12-inch stainless steel skillet or cast iron skillet and set over medium heat. Heat the oil to 175°C / 350°F, which takes approximately 4 minutes, confirmed with an instant-read thermometer or a wooden chopstick inserted into the oil that produces a steady stream of small bubbles.
- Fry the First Side: Gently lower one breaded chicken cutlet into the hot oil using tongs, laying it away from you to avoid splatter. Cook for 5 minutes without moving the cutlet until the underside is deep golden brown and the breading releases cleanly from the pan surface. Fry in batches of 1 or 2 cutlets at a time to maintain the oil temperature at 175°C / 350°F throughout cooking.
- Fry the Second Side: Flip the cutlet carefully with tongs and cook the second side for 4 minutes until it matches the deep golden color of the first side and an instant-read thermometer inserted into the thickest part of the chicken reads 74°C / 165°F. Transfer the finished cutlet to a wire rack set over a baking sheet. A wire rack allows air to circulate under the crust and prevents steam from softening the bottom coating.
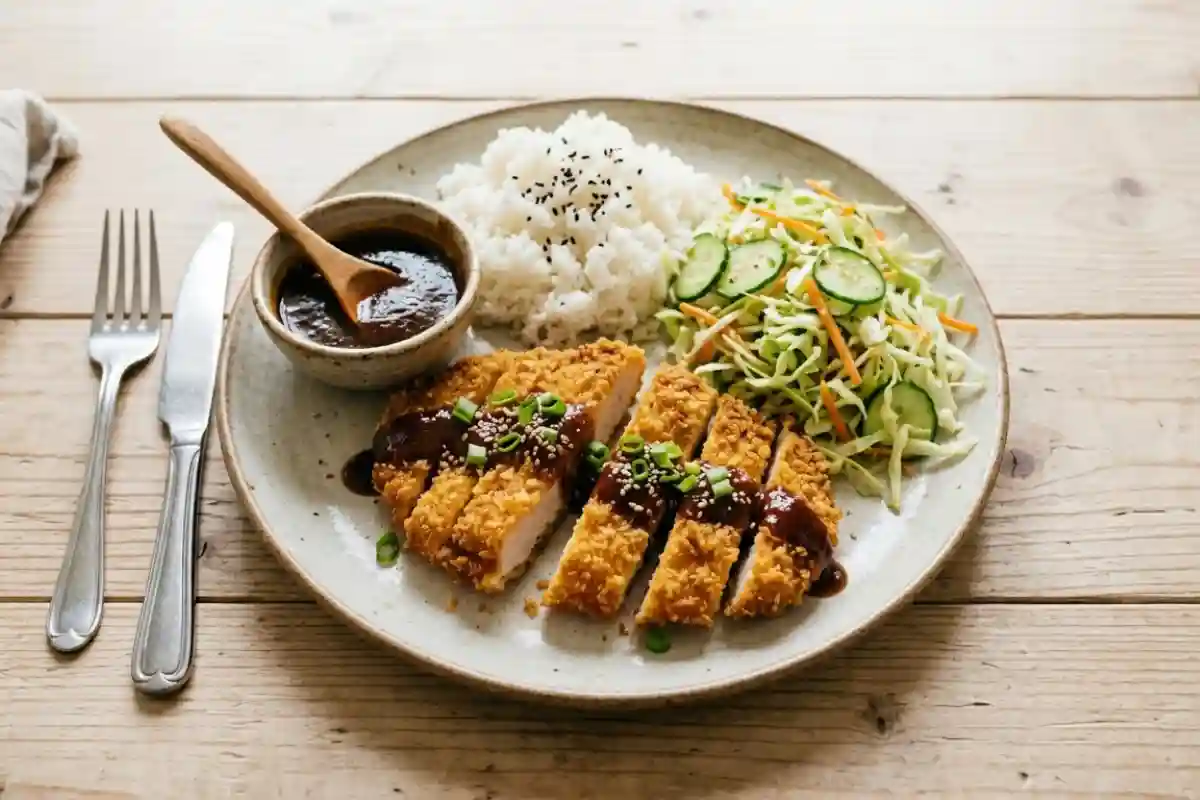
- Rest and Slice: Allow the finished chicken katsu to rest on the wire rack for 3 minutes before slicing. Place the cutlet on a cutting board and slice crosswise into strips approximately 2cm / 0.8in wide using a sharp chef's knife. Arrange the sliced katsu over a mound of shredded green cabbage and steamed rice, then drizzle or serve tonkatsu sauce alongside.
Notes
- Storage: Transfer cooled chicken katsu to an airtight container lined with parchment paper and refrigerate for up to 3 days. Place a sheet of parchment between each cutlet to prevent the panko crust from sticking to adjacent pieces.
- Reheating: Place refrigerated chicken katsu on a wire rack set over a baking sheet. Reheat in an oven preheated to 200°C / 390°F for 8 minutes until the panko crust is crisp again and the internal temperature of the chicken returns to 74°C / 165°F. Avoid the microwave for reheating, as it steams the panko coating and produces a soggy crust.
- Make-Ahead: Bread the chicken cutlets up to 8 hours in advance and refrigerate them uncovered on a wire rack. Refrigerating the breaded cutlets without covering them allows the panko coating to dry slightly, which produces a crispier crust when fried. Do not bread the cutlets more than 8 hours ahead, as the egg wash will begin to soften the panko.
- Substitution: Boneless, skin-on chicken thighs substitute well for chicken breasts in this recipe. Pound thighs to a uniform 1.2cm / 0.5in thickness before breading and fry at 175°C / 350°F for 6 minutes per side, verifying an internal temperature of 74°C / 165°F. Thighs produce a juicier result due to their higher fat content.
- Freezing: Freeze fully cooked and cooled chicken katsu in a single layer on a parchment-lined baking sheet for 1 hour until solid, then transfer to a freezer-safe zip-lock bag. Freeze for up to 2 months. Reheat directly from frozen on a wire rack in an oven at 200°C / 390°F for 14 minutes until the crust is golden and the internal temperature reaches 74°C / 165°F.
- Oil Temperature: Maintaining the oil at a steady 175°C / 350°F is the single most important factor for a crispy, non-greasy crust. Oil that drops below 160°C / 320°F allows the panko to absorb excess oil before the crust sets. Use an instant-read thermometer to check the oil temperature between each batch and allow the oil to return to 175°C / 350°F before adding the next cutlet.
FAQs
What is Chicken Katsu?
Chicken Katsu is a Japanese breaded chicken cutlet made from a pounded chicken breast coated in flour, egg wash, and panko breadcrumbs, then pan-fried in neutral oil. It belongs to the yoshoku category of Japanese cuisine, which adapts Western cooking methods to Japanese ingredients. The dish is closely related to tonkatsu, which uses pork loin instead of chicken. Chicken Katsu is typically served over shredded cabbage and steamed rice with tonkatsu sauce.
What is the difference between Chicken Katsu and tonkatsu?
Tonkatsu uses a thick pork loin or pork rib chop as its base protein, while Chicken Katsu uses a boneless chicken breast or thigh. Both dishes use the same panko breading process and are fried at the same oil temperature. Tonkatsu predates Chicken Katsu in the yoshoku tradition and remains the more common preparation in Japan. The two dishes share the same dipping sauce, tonkatsu sauce, which is a thick, savory condiment similar in flavor profile to Worcestershire sauce.
Why does my Chicken Katsu breading fall off?
Breading separation occurs when the flour layer is applied to a wet chicken surface or when the panko is not pressed firmly enough into the egg wash. Pat the chicken completely dry with paper towels before dredging in flour, and press the panko into both sides of the cutlet with firm, even hand pressure. Refrigerating the breaded cutlet uncovered for 30 minutes before frying also helps the coating bond and reduces separation during cooking.
What temperature should Chicken Katsu reach when cooked?
Chicken Katsu must reach an internal temperature of 74°C / 165°F at the thickest point of the cutlet. Use an instant-read thermometer inserted horizontally into the center of the cutlet to confirm doneness. At a uniform 1.2cm / 0.5in thickness, the cutlet typically reaches this temperature after 5 minutes on the first side and 4 minutes on the second side in oil maintained at 175°C / 350°F.
Can you make Chicken Katsu in an air fryer?
Chicken Katsu cooks successfully in an air fryer, though the crust texture differs slightly from the pan-fried version. Spray the breaded cutlets generously with neutral cooking oil spray on both sides and air fry at 200°C / 390°F for 10 minutes, flipping halfway through, until the panko is golden and the internal temperature reaches 74°C / 165°F. The air fryer method reduces the total oil used from 240ml to approximately 2 tablespoons of spray oil per batch.
What sauce goes with Chicken Katsu?
Tonkatsu sauce is the traditional accompaniment for Chicken Katsu. It is a thick, dark, slightly sweet condiment made from fruit puree, vegetables, and Worcestershire-style seasoning, sold in Japanese grocery stores under brands such as Bull-Dog. A quick homemade version combines ketchup, Worcestershire sauce, soy sauce, and a small amount of sugar. Chicken Katsu also pairs well with katsu curry, where the sliced cutlet is served alongside a mild Japanese curry sauce over steamed rice.
What do you serve with Chicken Katsu?
Chicken Katsu traditionally accompanies finely shredded raw green cabbage, steamed Japanese short-grain rice, and a small bowl of miso soup. The shredded cabbage provides a fresh, crunchy contrast to the fried crust and is dressed lightly with rice vinegar or Japanese sesame dressing. For a more complete meal, serve Chicken Katsu alongside high-protein recipes that include pickled vegetables or a simple cucumber sunomono salad.
Can you make Chicken Katsu gluten-free?
Chicken Katsu becomes gluten-free by substituting the all-purpose flour with rice flour and the standard panko with certified gluten-free panko breadcrumbs. Rice flour produces a similarly crisp coating because it absorbs less moisture than wheat flour during frying. Verify that the tonkatsu sauce used for serving is also gluten-free, as many commercial versions contain wheat-based soy sauce or Worcestershire sauce as an ingredient.